Books |
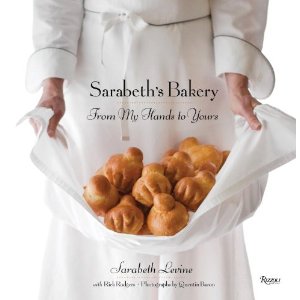
Sarabeth’s Bakery: From My Hands to Yours
Sarabeth Levine
By
Published: Nov 17, 2010
Category:
Food and Wine
I have never understood brunch, largely because my interest in sleeping late on Sunday, slowly making my way through the New York Times and then heading out, fashionably unshaven, for eggs-and-carbs is about equal to my desire to listen to Josh Groban’s Christmas CD.
Which means I have never been to Sarabeth’s, though it is just a few blocks from my home.
Just as well — I don’t do lines. And even before Sarabeth’s opens on weekend mornings, there’s a line outside. By noon, there’s a crush of New Yorkers on the sidewalk, waiting with uncommon patience.
One might think: This place must be really terrific.
Or one might think: People are such sheep.
Yeah, I vote for #2.
But I have had a rethink recently, and it’s due entirely to the arrival of “Sarabeth’s Bakery: From My Hands to Yours.” Big, thick, beautifully laid out and photographed, this book features more than a hundred recipes for goodies made in the oven: breads, muffins, cakes, pies, cookies. The recipes are clear, exacting, and if Sarabeth does not specify King Arthur whole-grain flour, I forgive her. [To buy the book from Amazon, click here.]
What’s particularly appealing is the absence of condescension. Baking can be considerably trickier than cooking. Happily, most of the recipes are not beyond the ability of an amateur baker. Still, her explanations will introduce you — well, me, anyway — to concepts and techniques never seen before in a popular cookbook. Do you know what a “turn” is? Détrempe? Beurrage? You will.
Sarabeth began making jams and jellies thirty years ago. She started with one shop, began baking for restaurants, and then she and her husband boldly moved into the restaurant business. She could have slowed her expansion at any point and enjoyed a healthy success — but she keeps going. And I have to think the reason is the high quality of her products.
There are those who say her empire rests on a base of Pumpkin Muffins — the first thing out of her oven to turn hardened Manhattanites into drooling supplicants. So let’s start the recipe section with them. And then….well, gotta love these carbs.
PUMPKIN MUFFINS
Makes 12 to 14 muffins
Bakers Note: If you use generous scoops of batter, the yield will be 12 muffins. For smaller muffins, use 7 muffin cups in each of 2 muffin pans. Distribute the batter in a random pattern (not in rows) in each pan so the muffins bake evenly. Butter only the cups that you are going to use, or the butter in the empty cups will burn.
Softened unsalted butter, for the pan
3 2/3 cups pastry flour, sifted
1 tablespoon plus 1 teaspoon baking powder
1 teaspoon ground cinnamon
¼ teaspoon ground ginger
¼ teaspoon freshly grated nutmeg
¼ teaspoon fine sea salt
8 tablespoons (1 stick) unsalted butter, chilled and cut into ½-inch cubes
1 1/3 cups superfine sugar
4 large eggs, at room temperature, beaten
One 15-ounce can solid-pack pumpkin
1 cup seedless golden or dark raisins
¼ cup hulled unsalted sunflower seeds
1. Position a rack in the center of the oven and preheat to 400°F. Brush the insides of 12 to 14 muffin cups with softened butter, then brush the top of the pan.
2. Sift the flour, baking powder, cinnamon, ginger, nutmeg, and salt together into a medium bowl. Beat the butter in the bowl of a heavy-duty stand mixer fitted with the paddle attachment on high speed until creamy, about I minute. Gradually beat in the sugar and continue beating, scraping the sides of the bowl often with a silicone spatula, until the mixture is very light in color and texture, about 5 minutes. Gradually beat in the eggs. Reduce the mixture speed to low. Beat in the pumpkin; the mixture may look curdled. In thirds, beat in the flour mixture, scraping down the sides of the bowl often, and mix until smooth. Add the raisins. Increase the speed to high and beat until the batter has a slight sheen, about 15 seconds, no longer.
3. Using a 2½ inch-diameter ice-cream scoop, portion the batter, rounded side up, into the prepared cups. Sprinkle the tops with the sunflower seeds.
4. Bake for 10 minutes. Reduce the oven temperature to 375°F and continue baking until the tops of the muffins are golden brown and a wire tester inserted into the center of the muffin comes out clean, about 15 minutes more.
5. Cool in the pan for 10 minutes. Remove the muffins from the pan and cool completely.
CHRISTMAS BUTTERY SHORTBREAD COOKIES
Shortbread Cookies traditionally have just a few ingredients, so the buttery flavor really comes through. My cookies get a little extra crunch from the sugar sprinkled over the hot baked cookies as they come out of the oven. You can cut out any size or shape you like. Shapes with rounded edges bake best, because sharp points (on stars, for example) tend to get too brown. These caveats aside, shortbread is really quite easy to make.
1 cup (2 sticks) unsalted butter, chilled and cut into 1/2" cubes
1/2 cup superfine sugar
1/2 teaspoon vanilla extract
grated zest of half a lemon
1-2/3rd cups (8 ounces) unbleached flour
4 teaspoons granulated sugar for sprinkling
1/2 cup superfine sugar
1/2 teaspoon vanilla extract
grated zest of half a lemon
1-2/3rd cups (8 ounces) unbleached flour
4 teaspoons granulated sugar for sprinkling
Makes: 36 cookies
Preparation time: 20 minutes
Cooking time: 12 minutes
Preparation time: 20 minutes
Cooking time: 12 minutes
1. In the bowl of a heavy-duty electric mixer fitted with the paddle blade, beat the butter, superfine sugar, vanilla and lemon zest on medium speed until light in color and texture, about 2 minutes. With the machine on very low speed, gradually add the flour, mixing just until the dough is combined. Do not overmix. Gather the dough into a ball.
2. Place the dough on a lightly floured work surface and sprinkle the top with flour. Roll into 1/2 inch thick rectangle. Place on a large piece of plastic wrap. Fold the plastic wrap loosely over the dough to enclose it, keeping the edge of the wrap at right angles. Using a rolling pin, roll the dough to fill the corners of the wrap. This will give you a nice rectangle that will be easy to roll out after chilling. Transfer to a baking sheet and refrigerate until the dough is chilled and firm, but not rock hard, about 1 hour.
3. Position the racks in the center and top third of the oven and preheat to 350 degrees.
4. Rap the 4 edges of the dough rectangle a few times on the work surface. Unwrap the dough and place on a lightly floured work surface. Sprinkle the top of the dough with flour. Roll out the dough into a 1/4" thick rectangle. (If the dough cracks, it is too cold; let stand at room temperature for 5 to 10 minutes and try again.
5. Using a 2" round cookie cutter dipped in flour, cut out the shortbread, cutting them out very closely to reduce the amount of scraps. Transfer the cookies to the prepared baking sheets, leaving about 1/2 inch space between the cookies. Gather up the remaining dough, rewrap in plastic, roll into another 1/4" thick rectangle, chill for about 10 minutes, and cut out more cookies. Repeat chilling and cutting until all of the dough is used up.
6. Bake, switching the position of the sheets from top to bottom and front to back halfway through baking, until the shortbread is very lightly browned, 10 to 12 minutes. Remove from the oven and immediately sprinkle the cookies with the granulated sugar (the sugar will not stick if the cookies aren’t hot). Cool the cookies completely on the baking sheets. Remove and serve!
CHOCOLATE CLOUDS
Makes: 3 dozen cookies
Baker’s Note: Place the dough about 3 inches apart on the half-sheet pans — they spread.
1 1/3 cup superfine sugar
1 1/3 cup packed light brown sugar
16 tablespoons (2 sticks) unsalted butter, at room temperature, cut into ½-inch cubes
¾ teaspoon pure vanilla extract
2 large eggs, at room temperature, beaten
2 cups unbleached all-purpose flour
¾ teaspoon baking soda
¼ teaspoon fine sea salt
2 cups (8 ounces) toasted sliced almonds
2 cups (12 ounces) chocolate chips
1. Position racks in the center and top third of the oven and preheat to 350°F. Line 3 half-sheet pans with parchment paper. Rub the superfine sugar and brown sugar together through a coarse-mesh wire sieve into a medium bowl; set aside. Beat the butter in the bowl of a heavy-duty stand mixer fitted with the paddle attachment on high speed until smooth, about 1 minute. Gradually add the sugar mixture, then the vanilla. Beat, occasionally scraping the bottom and sides of the bowl, until the mixture is pale yellow and light-textured, about 5 minutes. Gradually beat in the eggs.
2. Sift the flour, baking soda, and salt together into a medium bowl. With the mixer speed on low, add the dry ingredients in three additions, mixing just until each addition is incorporated. Add the almonds and chocolate chips and mix just until combined. Remove the bowl from the mixer. Empty the dough onto the work counter, and use your hands to thoroughly distribute the almonds and chocolate chips in the dough.
3. Using a 2-inch-diameter ice-cream scoop, portion the batter onto the prepared pans. Using the heel of your palm, slightly flatten each ball of dough. Bake two of the pans with the cookies, switching the position of the pans from top to bottom and front to back about halfway through, the baking, until the cookies are evenly golden brown, 15 to 18 minutes. During the last 3 minutes, rap each pan on the rack. The cookies will deflate and their signature cracks will appear on the tops. Repeat with the third pan. Cool on the pans. (Store in an airtight container for up to 5 days.)